
 As promised, I put together a little tutorial on how to get an easy, yet pretty, aged look to your photo. All you will need is your photo (don't worry about the colors, just get a photo where you like the composition), The dark brown watercolor washed paper from my new Country Cottage Collection (get it here), and an Photoshop Elements (I am using Photoshop Elements 9)
Sorry if the instructions are too simple for you! I don't know how advance everyone is, so just skip the steps that you already know!
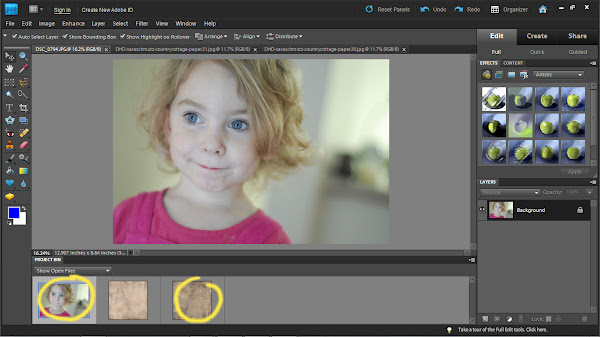 Open your files (picture & dark brown paper) into PSE.
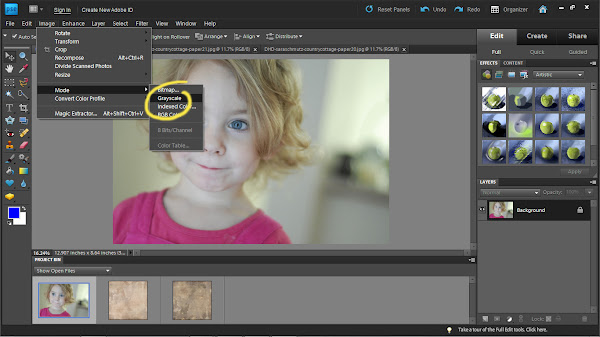 Click "Image" on the top toolbar
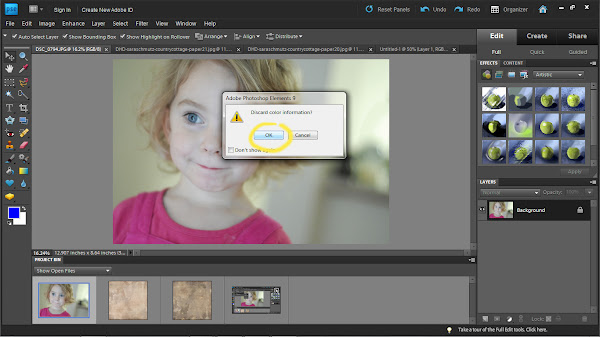 Click "Okay". We don't need the color information.
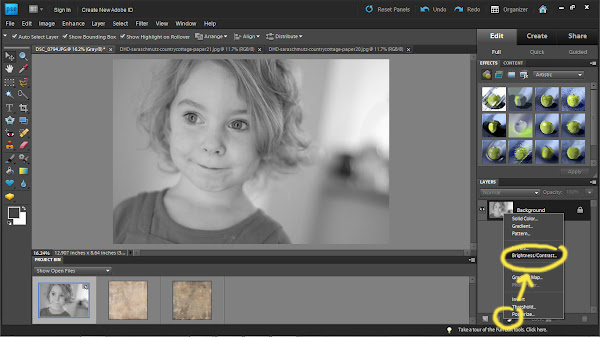 Click on the little half light/half dark circle at the bottom right of the screen.
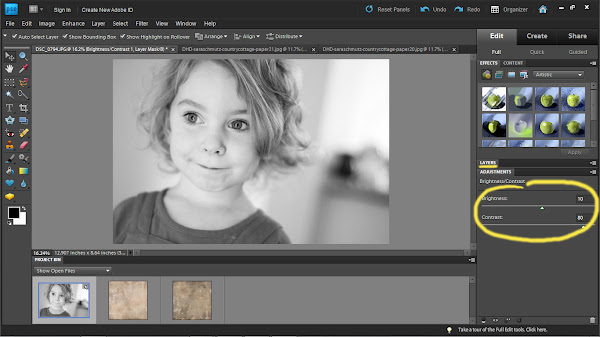 My photo wasn't very good coming straight from my camera, so it needed a little adjusting; especially when it came to the contrast. There is no right or wrong to this step, just adjust until you like your picture.
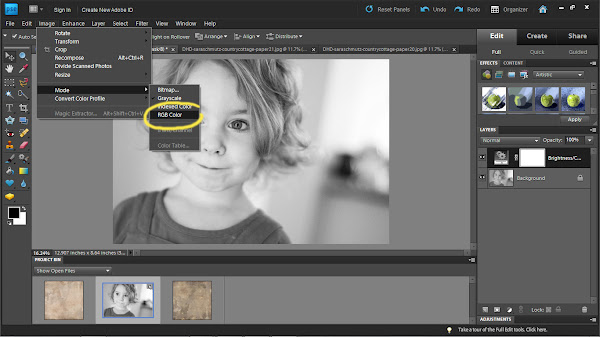 Now we've got to change back to RGB mode so we can add some color.

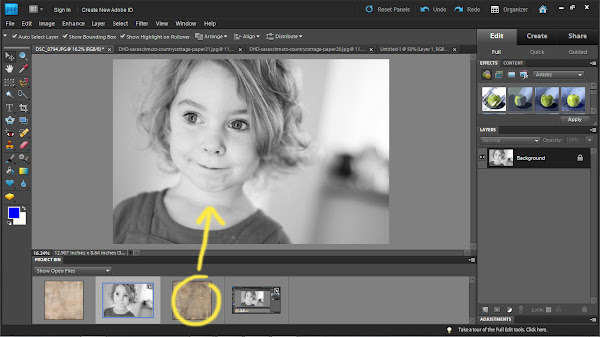 Next, drag the dark brown paper onto your picture. Just click the brown paper with your mouse, hold down, and drag your mouse arrow up onto your picture.
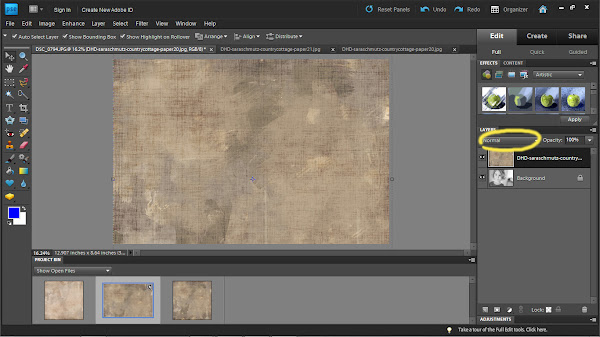 Click on the drop down menu (should say "Normal"), which is right under the "Layers" tab.
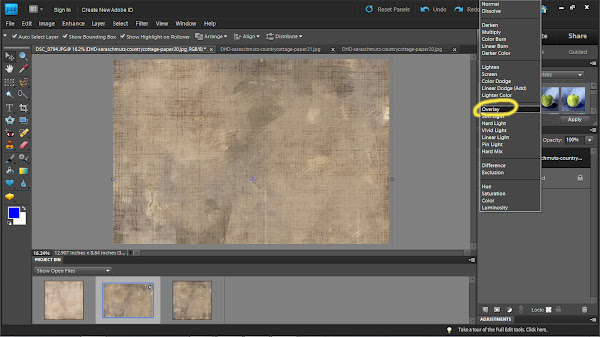 From the drop down menu, select "Overlay"
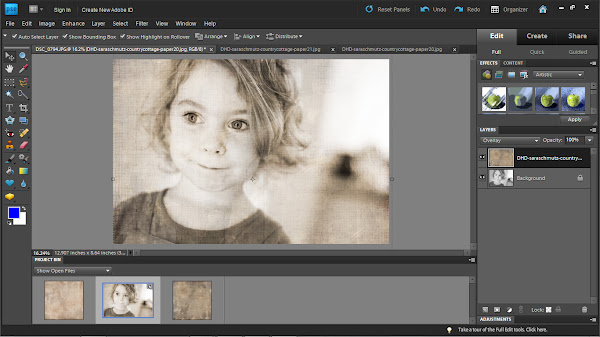 And you should have your finish product! The "Overlay" feature basically takes all the blacks and grays in your picture and replaces them with the browns and lighter browns in the paper.
quick note - all the pictures below are bigger than they appear on the blog. Just right click on the picture, and select "Open In a New Window" to see the full sized picture.
 Open your files (picture & dark brown paper) into PSE.
 Click "Image" on the top toolbar
scroll down to "Mode"
finally, click "Grayscale"
 Click "Okay". We don't need the color information.
 Click on the little half light/half dark circle at the bottom right of the screen.
From that menu, select "Brightness/Contrast"
 My photo wasn't very good coming straight from my camera, so it needed a little adjusting; especially when it came to the contrast. There is no right or wrong to this step, just adjust until you like your picture.
Once you are done adjusting, click on the "Layers" tab (underlined in the picture)
 Now we've got to change back to RGB mode so we can add some color.
Click on "Image" on the top bar
Click "Mode"
Click "RGB Color"

Choose "Flatten", unless you are going to want to adjust your contrast some more in the future. If you are, select "Don't Flatten" ...pretty self explanatory stuff, eh?
 Next, drag the dark brown paper onto your picture. Just click the brown paper with your mouse, hold down, and drag your mouse arrow up onto your picture.
 Click on the drop down menu (should say "Normal"), which is right under the "Layers" tab.
 From the drop down menu, select "Overlay"
 And you should have your finish product! The "Overlay" feature basically takes all the blacks and grays in your picture and replaces them with the browns and lighter browns in the paper.
I hope you enjoyed this tutorial! Let me know if you have any follow up questions.


 ...my favorite blogs, I ran into
  I think using paper in the background was easier than fabric. It was super easy... 1st - measured the frame I wanted to use, 2nd - designed up a calendar in photoshop (or elements), 3rd- printed, 4th..5th..6th..7th - cleaned glass in frame, cut out paper, put frame back together, doodled with dry erase makers. pretty simple.
 It was a very fun, cheap
 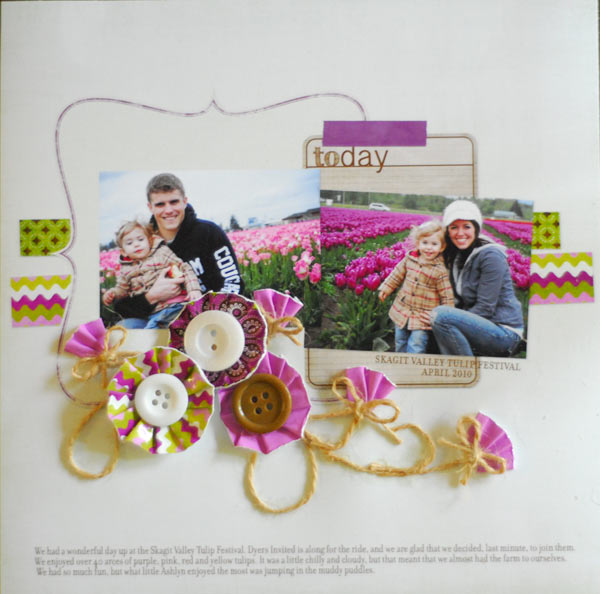 I have been asked how is it I make these flowers that I so love to do. It is quite simple, and simply, quite fun!
 You can use any size paper, but for the flowers above I used strips that were 1/2"x5". To begin, you can do some of your distressing by inking edges, crumbling up the paper to give it more wrinkles
  You then proceed to pinch the "accordion" fold the paper. It depends on the size of your paper, and the size of the flower you want in the end. I wish I had the mathematical equation laid out for each size of flower, but it is really just eyeballing most of it.


